Wednesday, April 3, 2013

And the Trim Work Continues

Here are a few things that Lenwood and his crew have been accomplishing lately:


Crown molding around the ceiling.  There are areas that have deeper molding, but in some places the trim on the windows and the Hitchcock ceiling make simpler trim necessary. 

The coffered ceiling in the dining room.  In Aiken it is frequently referred to as a Hitchcock ceiling.

Here is an example of the 2-part trim.  The white trim paint will go from the ceiling down over the smaller trim piece below, so it looks like one complex piece of trim.


Wednesday, March 20, 2013

Adding Some Character

As you can imagine, the next few days were filled with a lot of taping, mudding and sanding.

And taping, mudding, and sanding.

And taping, mudding and sanding.  Well, you get the idea.

Things went from dusty but empty to crowded again once the doors showed up,

the trim guys set up shop in the great room,

and trim work began.  This door has a space above for one of the interior transom windows that will go in.  We worked with Philip and his trim genius, Lenwood, to create a beautiful trim package. All the downstairs doors and windows have this 4 piece structure around it. Between that and the tall baseboards, the doors and windows occupy almost the entire 10 foot wall!

The illusion of judges panelling is created down the hallway.

From the stairs looking toward the back door.  The door to the garage is on the left, to the screened porch is on the right, and to the guest room and laundry is in the front right corner. 

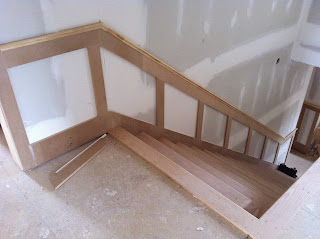
Speaking of stairs, they went in as well. 

 
We don't know what we're going to put in these built-ins in the dining room, but we love the interest that they add. 

Saturday, March 9, 2013

Nobody Sits on Their Front Porch Anymore

I can't wait to prove the person who said this to me wrong.  We're going to sit on our front porch all the time!  Wouldn't you if it looked like this?


Ok, you'll have to imagine it without the port-o-potty in the background, but still!
Note the beadboard ceiling, and exposed rafter tails. 

Time for Tile

Since we wanted to have hardwood floors in the master bath, Philip had a great idea to preserve the area outside the shower.  We had a tile inlay put in just outside the shower door to catch any water that might otherwise get onto the wood.  We really love the way it came out!
 
Here is the inside of one end of the master shower.  The body sprays and other shower head are at the other end. 

 
Hannah's bathroom has tile that looks a whole lot like hardwood! 

 
In the laundry room we opted for a traditional (and fun) black and white checkerboard.

 
This travertine is in the guest bath.

 
We also picked out some granite this week.  This piece is similar to the granite that will be in the kitchen.  It only comes in slabs up to 9' and change, so we had to shorten the kitchen island in order to make it work.  I think we'll still have plenty of space!

 
This is the granite that will go in the master bath and Christian's bath.  It'll go great with the black and white tile!


Thursday, February 28, 2013

From Construction Site to Home

Something happened this month.  We'd been spending all kinds of time walking around the space that is going to be our home, smelling the freshly sawed wood and sweeping up after plumbers and electricians, slipping between boards to get from room to room more quickly.  We knew it was going to be real...in our heads.  But it didn't really feel real until the insulation went in, and the drywall  went up. 

Can lights were roughed in.  Plumbing lines and speaker wires are also visible.

Insulation in the outer walls through the framework...

Fireplace insert and rough-in for the surround.

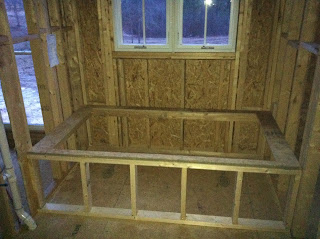
The master tub rough-in with drywall in place.
 
Hannah's room drywalled.

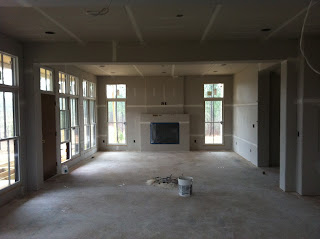
Looking from the kitchen toward the fireplace.

The breakfast room.

Looking from the fireplace toward the kitchen.

Christian's room drywalled.

Garage drywalled. 

And a parting shot of the exterior with all the Hardiplank up and work begun on the back porch, which will be screened in. 
 
It really feels like a home, now that rooms are more defined and the insulation is in place.  I thought the rooms would feel smaller and closed in, but it actually feels bigger somehow.

Sunday, February 24, 2013

Exterior Siding

We chose Hardiplank® siding because of its combination of durability, low maintenance, and price.  The siding on the first floor is 10-inch instead of the traditional 6-inch siding as it saved a little money and seemed to fit the scale of the house better.  The second floor has shingle-style siding in a straight-edged panel.  The combination is quite striking - see for yourself:

 
Hardiplank® siding on the garage exterior
 
Shingle-style siding on second floor
 
The front facade with the combined sidings installed.  Quite striking, we think!
The siding really fits the style of the house and should provide us with years of low-maintenance beauty!

Monday, January 28, 2013

All together now...

Once windows were in, siding began. 


With weather delays, holidays and other things afoot, the siding has been a little here and a little there.  That's okay, though.  When things were slow outside, they were hustling inside. 

Sheetrock was ordered...

 rough-ins were installed, work began on plumbing and wiring...


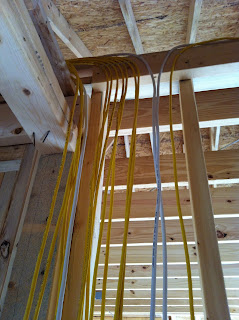
John installed a half mile of network, video and speaker cable...
 

a few fixtures were installed


 and duct work was run for the HVAC. 
 
Much discussion over what size HVAC unit to install.  In the end we opted for a 5-ton single unit.  Those windows are gorgeous, and under the shade of the porches, and slightly tinted, but there are still 36 of them, and that's a lot to keep up with!